Nov 13, 2024
How To Disassemble a Pool Table: The Complete Guide
Key Takeaways
-
Disassembling a pool table involves several crucial steps to ensure safety and prevent damage.
-
Proper tools and materials, such as a socket wrench, staple remover, and moving blankets, are necessary.
-
Preparing the area and organizing components helps streamline the process.
-
Removing pockets, rails, and felt requires careful handling to avoid damage.
-
Slate slabs are heavy and fragile, needing careful detachment and secure wrapping.
-
Professional pool table movers can provide expertise and insurance, adding value and protection.
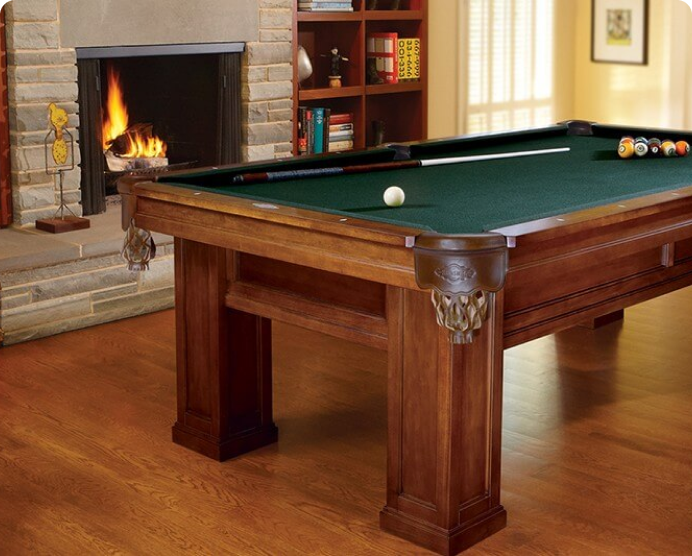
Disassembling a pool table might seem like a daunting task, but with the right tools and a bit of patience, you can handle it yourself. Whether you’re moving a pool table to a new home or just rearranging your game room, breaking down your pool table properly is essential to prevent damage and ensure a smooth reassembly. This guide will walk you through the detailed steps needed to safely and efficiently disassemble your pool table.
Tools and Materials Needed
To move a pool table effectively, you’ll need specialized tools and materials to ensure the job is done safely and efficiently. First, you’ll have to disassemble the pool table. This involves removing the rail bolts, which can be done using a socket wrench. Make sure you keep all bolts and screws in a safe place.
The slate slabs are heavy and require careful handling. Don’t try to lift them on your own due to the risk of injury and damage.
For the heavy lifting part, you’ll need a few strong helping hands or professional help to carefully lift the slate slabs. Moving blankets are essential to protect the slate and other parts of the table from scratches and damage during the move. Wrap each piece securely before transportation.
To move the disassembled parts, especially the bulky slate slabs, a furniture dolly is highly recommended. It will make the job much easier and reduce the strain on your back.
Preparing the Area
Ensure the area is clear of obstacles and has enough space to accommodate the disassembled parts of the pool table. Before you begin to disassemble a pool table, you’ll need to create a safe and organized space. This will make it easier to carefully remove and handle each component. Start by placing protective materials on the floor to prevent damage to the pool table surface and the flooring.
When you disassemble a pool table, begin by focusing on the side rails. Use a wrench to loosen the rail bolts underneath each side rail. Once you’ve removed these bolts, carefully lift the side rails off the playing surface. Place these rails on the protective materials to avoid any scratches or dents.
Next, address the slate carefully. The slate, which forms the main playing surface, is heavy and fragile. Remove it cautiously, ensuring that you don’t damage it. If your table has a ball return system, detach it as well, keeping all small parts and bolts organized.
Carefully labeling and storing these components will simplify reassembly later. By preparing the area properly, you’ll streamline the moving process and protect your investment.
Removing the Pockets
Start by unscrewing and detaching the pockets from the underside of the pool table. When disassembling a pool table, this step is crucial for a smooth process. Use a screwdriver to remove the screws holding the drop pockets in place. Once unscrewed, carefully pull the pockets out, ensuring you don’t damage the pocket liners.
Next, you’ll need a staple remover to tackle any staples securing the pocket straps. Falling staples can be hazardous, so it’s wise to wear eye protection. If some staples prove stubborn, needle nose pliers can help you grip and remove them. Be cautious and thorough to avoid leaving any stray staples behind.
For tables with leather drop pockets, gently detach them by unscrewing the brackets or clips holding them in place. Again, carefully pull them out to prevent tearing or damage. Make sure you keep track of all screws and small parts; losing them can complicate reassembly.
Detaching the Rails
With the pockets removed, it’s time to unscrew and detach the rails from the pool table. To disassemble a pool table, start by locating the bolts securing the rails. Most standard slate tables have three or four bolts per rail. Using the appropriate tools, carefully unscrew these bolts. Keep the bolts in a safe place, as you’ll need them when you reassemble the table.
Once the bolts are removed, you can begin detaching the rails. Lift each rail gently to avoid any damage. If the rails are connected to the pockets, you might need to carefully scrape away any adhesive or staples. When you move a pool table, it’s crucial to handle the rails with care to maintain their condition.
After detaching each rail, it’s a good idea to lay them out on a soft surface to prevent scratches. You might also have to carefully flip the rails to access any hidden screws or staples. Removing the rails is a meticulous process but essential for disassembling your pool table correctly.
Now that the rails are detached, you’re one step closer to successfully moving your pool table.
Removing the Felt
Gently pull back one corner of the felt to begin the process of removing it from the pool table. Start by using a flathead screwdriver to carefully remove all the screws securing the felt to the wood backing and the slate tabletop. This part of disassembling the pool table requires patience and precision to avoid tearing the felt or damaging the wood.
Once you’ve removed the screws, gently peel the felt off, ensuring it remains intact. Lay the felt flat, then fold it carefully, avoiding any creases. This felt will need to be stored in a climate controlled storage unit to prevent moisture damage or stretching.
Next, pay attention to the metal trim covering the edges and the ball return mechanism. These components might also require detaching to free the felt completely. Once the felt is removed, you’ll see the slate tabletop, which usually consists of three slate slabs.
Removing the felt is a crucial step in the disassembling process, and doing it correctly ensures you can reassemble your pool table without issues. Proper care and handling, including the use of a climate controlled storage unit, will keep the felt in excellent condition for future use.
Detaching the Slate
After carefully removing the felt, you can now focus on detaching the slate slabs from the pool table. The slate bed usually consists of one or more heavy slate slabs, which you’ll need to disassemble with care. Follow the standard slate table instructions provided by the manufacturer to ensure you don’t damage any components.
Start by identifying and removing the screws or bolts securing the slate to the table frame. Use the appropriate tools, and keep track of all hardware for reassembly.
As you lift each slate slab, enlist help because these slabs are heavy and fragile. Place each slab on a flat surface covered with protective materials to avoid any chips or cracks during the transport.
Careful planning is essential here. Label each slate piece to ensure minimal variation when you reassemble the pool table later. Make sure the slate bed is perfectly aligned to maintain the table’s playing surface quality.
Once detached, wrap each slate slab securely for transport, ensuring they’re well-protected from any potential damage. Following these steps will make the moving process smoother and help you avoid costly repairs or replacements.

Disassembling the Frame
To disassemble the frame, start by removing the legs and any additional hardware that connects the frame pieces.
Knowing how to disassemble a pool table is crucial, especially if you have a non-slate table. Non-slate tables are generally lighter and easier to handle, but you still need to be careful with each component.
Begin by unscrewing the three bolts that secure the center beam to the frame. Once the center beam is free, you can move on to other components like the rails and pockets.
If your table has a ball return mechanism attached, you’ll need to disconnect it carefully to avoid damaging any parts. Use a furniture strap to keep all the disassembled parts organized and prevent them from shifting during the move. This will make it easier to transport non-slate tables without causing any harm.
After everything is disassembled, ensure that you label each piece and keep all screws and bolts in a safe place.
When the time comes, you can easily reassemble the table at your desired location. Proper disassembly ensures your pool table arrives in perfect condition, ready for its new home.
Packing and Transporting Parts
Once your pool table is disassembled, carefully wrap each part in protective padding to prevent any damage during transport. Start by using plastic sheeting to cover the slate pieces and other lightweight pieces. It’s essential to secure these with padding from a pool table supply store to ensure they’re well-protected. For old pool tables, take extra care with worn or delicate parts.
Next, focus on the legs. Whether you have folding legs or fixed ones, wrap them in protective materials to avoid scratches or dents. If your table has a ball return system or a coin-operated mechanism, these components also need thorough wrapping. You can use bubble wrap or specialized padding for these intricate parts.
When loading everything onto the truck, make sure to use truck slats to keep the pieces from shifting during transit. Arrange the parts so that the heaviest items, like the slate, are on the bottom and the lighter parts are on top. This method helps maintain balance and prevents damage.
The Choice to Hire Professionals
Hiring professionals to move your pool table can save you significant time and effort. Pool tables are heavy and cumbersome, and dismantling and reassembling them requires specific expertise. Pool table movers have the skills and tools to handle even non-slate material and lightweight pieces with care. They’ll use protective materials to wrap the rails and other components, ensuring they don’t get damaged during the move.
The cost of hiring professionals is justified by the convenience and peace of mind you gain. Pool tables have delicate parts that need careful handling. The rails, for instance, can be a difficult part to manage without proper experience. Professionals know how to pack these parts securely, often using sealed plastic bags for smaller components to prevent loss.
Moreover, pool table movers can streamline the entire process, reducing the risk of damage and ensuring everything is set up correctly in your new location. They handle the heavy lifting, transportation, and pool table reassembly, so you won’t have to worry about a thing. While the cost might seem high initially, the average cost to move a pool table can range between $600 and $1000, it’s an investment in preserving the quality and longevity of your pool table.

Frequently Asked Question
Can you disassemble a pool table yourself?
Yes, you can disassemble a pool table yourself with the right tools and careful planning. The process involves several steps: removing the pockets by prying out staples or unscrewing them, detaching the rails by unscrewing bolts, and carefully removing the felt, which may be stapled or glued.
Next, the slate pieces must be lifted off the table—this step requires at least two people due to the weight and delicacy of the slate. Finally, the legs are unscrewed and removed. If you manage to break a part or need to repair your pool table, don’t fret, we’ve got you covered.
It’s crucial to keep all screws, bolts, and small parts organized in labeled bags to ensure smooth reassembly later. While it’s a labor-intensive task that requires patience and caution, particularly with the slate and felt, it is doable without professional help.
How do you break down and move a pool table?
To break down and move a pool table, follow these detailed steps. First, remove the pockets, which are usually attached with staples or screws. Use a staple remover or screwdriver to carefully detach them. Next, unscrew the bolts holding the rails and remove them. Afterward, remove the felt by gently pulling out the staples or peeling off the adhesive without tearing the cloth. Even if you do tear the cloth, re-clothing the pool table and choosing a brand new cloth for a brand new place is a great way of refreshing your pool table’s looks.
The slate pieces, which are heavy and fragile, need to be unscrewed and lifted carefully with assistance to avoid damage. Once the slate is removed, unscrew the legs from the frame. Wrap all components, especially the slate, in moving blankets or bubble wrap to protect them during transport. Ensure all screws, bolts, and small parts are kept in labeled bags for easy reassembly. Hiring professional movers is recommended due to the table’s weight and complexity, but with the right tools and careful handling, it can be done yourself
How long does it take to disassemble a pool table?
Disassembling a pool table typically takes around two to four hours, depending on the table’s size, complexity, and the experience of the people involved. The process involves several steps, including removing the pockets, rails, and felt, disassembling the slate, and detaching the legs.
The time required can vary based on the tools available and whether you have assistance. It is crucial to handle each component carefully to avoid damage, especially the slate, which is heavy and fragile. Ensuring all parts are organized and labeled can also affect the duration of the disassembly.
Can I move a pool table by myself?
Moving a pool table by yourself is highly challenging and generally not recommended due to the table’s size, weight, and the complexity of the disassembly and reassembly process. Pool tables can weigh up to 1,000 pounds and require careful handling to avoid damage to the table and prevent personal injury. While it is possible to move a pool table with the help of several strong friends and the right tools (such as a power drill, screwdriver, socket wrench, and moving blankets), professional movers are strongly advised for such a task.
Professional movers have the expertise and equipment to disassemble, transport, and reassemble the table safely and efficiently. If you choose to do it yourself, make sure to gather all necessary supplies, enlist at least four to five helpers, and carefully follow step-by-step disassembly instructions to ensure all parts are protected and properly labeled for reassembly
Conclusion
So, you could spend your weekend sweating over a complicated disassembly, risk tearing the felt, and maybe even throw out your back.
Or, you could hire professionals who’ll do it all smoothly, with insurance to boot. Sure, it might cost a bit more upfront, but think of the chiropractor bills you’ll save.
In the end, isn’t it ironic that sometimes spending money actually saves you money—and a whole lot of hassle?